7 minutes
Understanding and configuring FTPS/TLS in AWS EC2 instance.

Today we are going to learn about FTP and how we can set up a FTP server with TLS certificates.
Refresher
What is FTP?
FTP stands for file transfer protocol which is a way of transferring files between computers.
Fun facts: FTP itself is a noun and a verb.
SFTP vs FTPS?
The. Key difference between SFTP and FTPS is both use different protocol. SFTP uses SSH for transferring files as means of secure communication whereas FTPS uses TLS certificates. FTPS is more secure as it added extra security with passwords, TLS certificates.
What is FTPS?
FTPS is a secure file transfer protocol to transfer files from one server to another. It uses strong algorithms like AES, and Triple DES to encrypt file transfers. FTPS is to FTP like HTTPS is to HTTP. FTPS uses two seperate connections which decouples the FTP operations.
What is FTP in passive mode and how does it work?
In passive mode (PASV) FTP client opens up a random port and initiates connection to FTP server at port 21. It issues PASV command. PASV command basically means “Can you tell me the ip address and port is should use to connect to server ?”.
Then, FTP server replys with a random port which it opens up for data connection. Server creates a random port and sends the port to the client and waits for client to initiate data connection.
FTP client receives the information and opens up another connection using a random port on client side with random port passed from server for data connection.
Once connection is established, data transfer is then done using these random ports.

Which one should I use SFTP or FTPS?
Both protocols are secure to transfer data over FTP and boils down to what requirements you have. SFTP has some severe performance issues with large files and high latency connections hence if the distance is large then SFTP limitations starts to become significant. If compliance is a concern for you and your organisation and want to adhere to PCI DSS, HIPAA or SOX then using FTPS is recommended.
If you want easy approach then using SFTP shoud be fine but if you want more security then go for FTPS which we are doing today.
Configuring FTPS on AWS EC2 with self-signed certificate
Today we are going to configure FTPS in passive mode.
Requirements:
- AWS ACCOUNT
- VM (EC2)
Image our FTP domain name is ftp.99devops.com then we will need to have a proper certificate. For now, I will be creating a self-signed corticate but for production, it would be good to use a proper CA signed certificate
Create VM in AWS ec2. Once VM is created, make sure its running had it is getting ip address.

Now, Add the DNS record on DNS server for ftp. Add a A record for this FTP server on your DNS server. I am using cloudflare as my DNS server.

Once your DNS has been added and you have tested, you can access (SSH) into you VM using your DNS address. Go to Security groups on AWS which is attached to your VM and add followings
Allow following TCP ports on your server.
10000-10100 – FTP ports for data connection
22 - SSH port
21 - FTP port for command connection
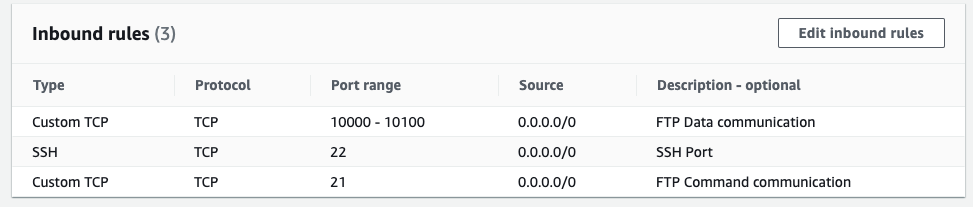
NOTE: For this tutorial, i am exposing this server to everyone. In production, you should setup appropriate source IP address there. If server needs to be exposed to the internet and it is not possible to whitelist IP then see suggestions in RECOMMENDATION section.
Now we are ready to configure FTP server.
Generating self signed certificate
SSH into your VM and Create a folder for your certs and go inside that folder
mkdir -p /etc/ssl/private
cd /etc/ssl/private
Generate a self-signed certificate or use your CA signed certificate. To generate certs use following command
% openssl req -x509 -newkey rsa:4096 -sha256 -days 3650 -nodes -keyout vsftpd.key -out vsftpd.crt

Generating a 4096 bit RSA private key
.....................................................................................................................................................................................................................................................................................................................................................................................................................................++
......................++
writing new private key to 'vsftpd.key'
-----
You are about to be asked to enter information that will be incorporated
into your certificate request.
What you are about to enter is what is called a Distinguished Name or a DN.
There are quite a few fields but you can leave some blank
For some fields there will be a default value,
If you enter '.', the field will be left blank.
-----
Country Name (2 letter code) []:AU
State or Province Name (full name) []:NSW
Locality Name (eg, city) []:Sydney
Organization Name (eg, company) []:99DevOps
Organizational Unit Name (eg, section) []:SRE
Common Name (eg, fully qualified host name) []:ftp.99devops.com
Email Address []:[email protected]
Check if certs are there are not
% ls -la /etc/ssl/private

-rw-r--r--. 1 root root 2130 May 22 08:43 vsftpd.crt
-rw-------. 1 root root 3272 May 22 08:42 vsftpd.key
Now we have generate our self-signed certificate. Let’s configure FTP
Installing and configuring FTP
Search if vsftpd package is available, if available install vsftpd.
% yum search vsftp

Last metadata expiration check: 2:14:27 ago on Sat 22 May 2021 06:30:15 AM UTC.
================================ Name Matched: vsftp ================================
vsftpd.x86_64 : Very Secure Ftp Daemon
% yum install -y vsftpd
Delete everything from /etc/vsftpd/vsftpd.conf as we are going to use fresh configuration and write everything by ourself.
Add following lines in /etc/vsftpd/vsftpd.conf. What each command does is described in the comment.
# Enabling this would run FTP server on stand-alone mode
listen=NO

listen_ipv6=YES

# disable anonymous login
anonymous_enable=NO

# allow local uses to login
local_enable=YES

# Uncomment this to enable any form of FTP write command.
write_enable=YES

# The value that the umask for file creation is set to for local users
local_umask=022

# If enabled, users of the FTP server can be shown messages when they first enter a new directory
dirmessage_enable=YES

# using local time
use_localtime=YES

# logs
xferlog_enable=YES

# This controls whether PORT style data connections use port 20 (ftp-data) on the server machine.
connect_from_port_20=YES

# local users will be (by default) placed in a chroot() jail in their home directory after login
chroot_local_user=YES

# Workaround chroot check.
allow_writeable_chroot=YES

# String for the PAM service name vsftpd will use
pam_service_name=vsftpd

# Certificate information
rsa_cert_file=/etc/ssl/private/vsftpd.crt
rsa_private_key_file=/etc/ssl/private/vsftpd.key
require_ssl_reuse=NO

# Configure FTP over TLS options
ssl_ciphers=HIGH
ssl_enable=Yes
allow_anon_ssl=NO
force_local_data_ssl=YES
force_local_logins_ssl=YES

# Configure FTP PASV mode settings
pasv_enable=Yes
port_enable=NO
pasv_address=100.XX.XX.XX # <= SERVER IP HERE
pasv_promiscuous=YES
pasv_min_port=10000
pasv_max_port=10100
allow_writeable_chroot=YES
ssl_tlsv1=YES
ssl_sslv2=NO
ssl_sslv3=NO

# Disabling this option allows vsftpd to run with less privileges, but may be incompatible with some FTP clients.
connect_from_port_20=NO
ftp_data_port=NO
Save the file and restart vsftpd service
% systemctl restart vsftpd
% systemctl enable vsftpd
Check if vsftpd is running
% systemctl status vsftpd

● vsftpd.service - Vsftpd ftp daemon
   Loaded: loaded (/usr/lib/systemd/system/vsftpd.service; enabled; vendor preset: d>
   Active: active (running) since Sat 2021-05-22 08:51:39 UTC; 14s ago
 Main PID: 14171 (vsftpd)
    Tasks: 1 (limit: 4821)
   Memory: 764.0K
   CGroup: /system.slice/vsftpd.service
           └─14171 /usr/sbin/vsftpd /etc/vsftpd/vsftpd.conf

May 22 08:51:39 ip-172-31-82-212.ec2.internal systemd[1]: Starting Vsftpd ftp daemon>
May 22 08:51:39 ip-172-31-82-212.ec2.internal systemd[1]: Started Vsftpd ftp daemon.
Creating FTP user and directory
Make directory for the FTP user
Mkdir -p /var/ftp
Now, add user who would be able to access FTP server. Add user, change. User password and make sure home directory is configured as user would access the same directory via FTP
mkdir /var/ftp
useradd ftp-user
passwd ftp-user
usermod -d /var/ftp ftp-user
chown -R ftp-user:ftp-user /var/ftp
Now open any FTP client and access the server. For test , I am using FileZilla
On filezilla go to File > Site Manager, fill the blanks as shown in the image below
Connect, it will prompt to trust certificate.
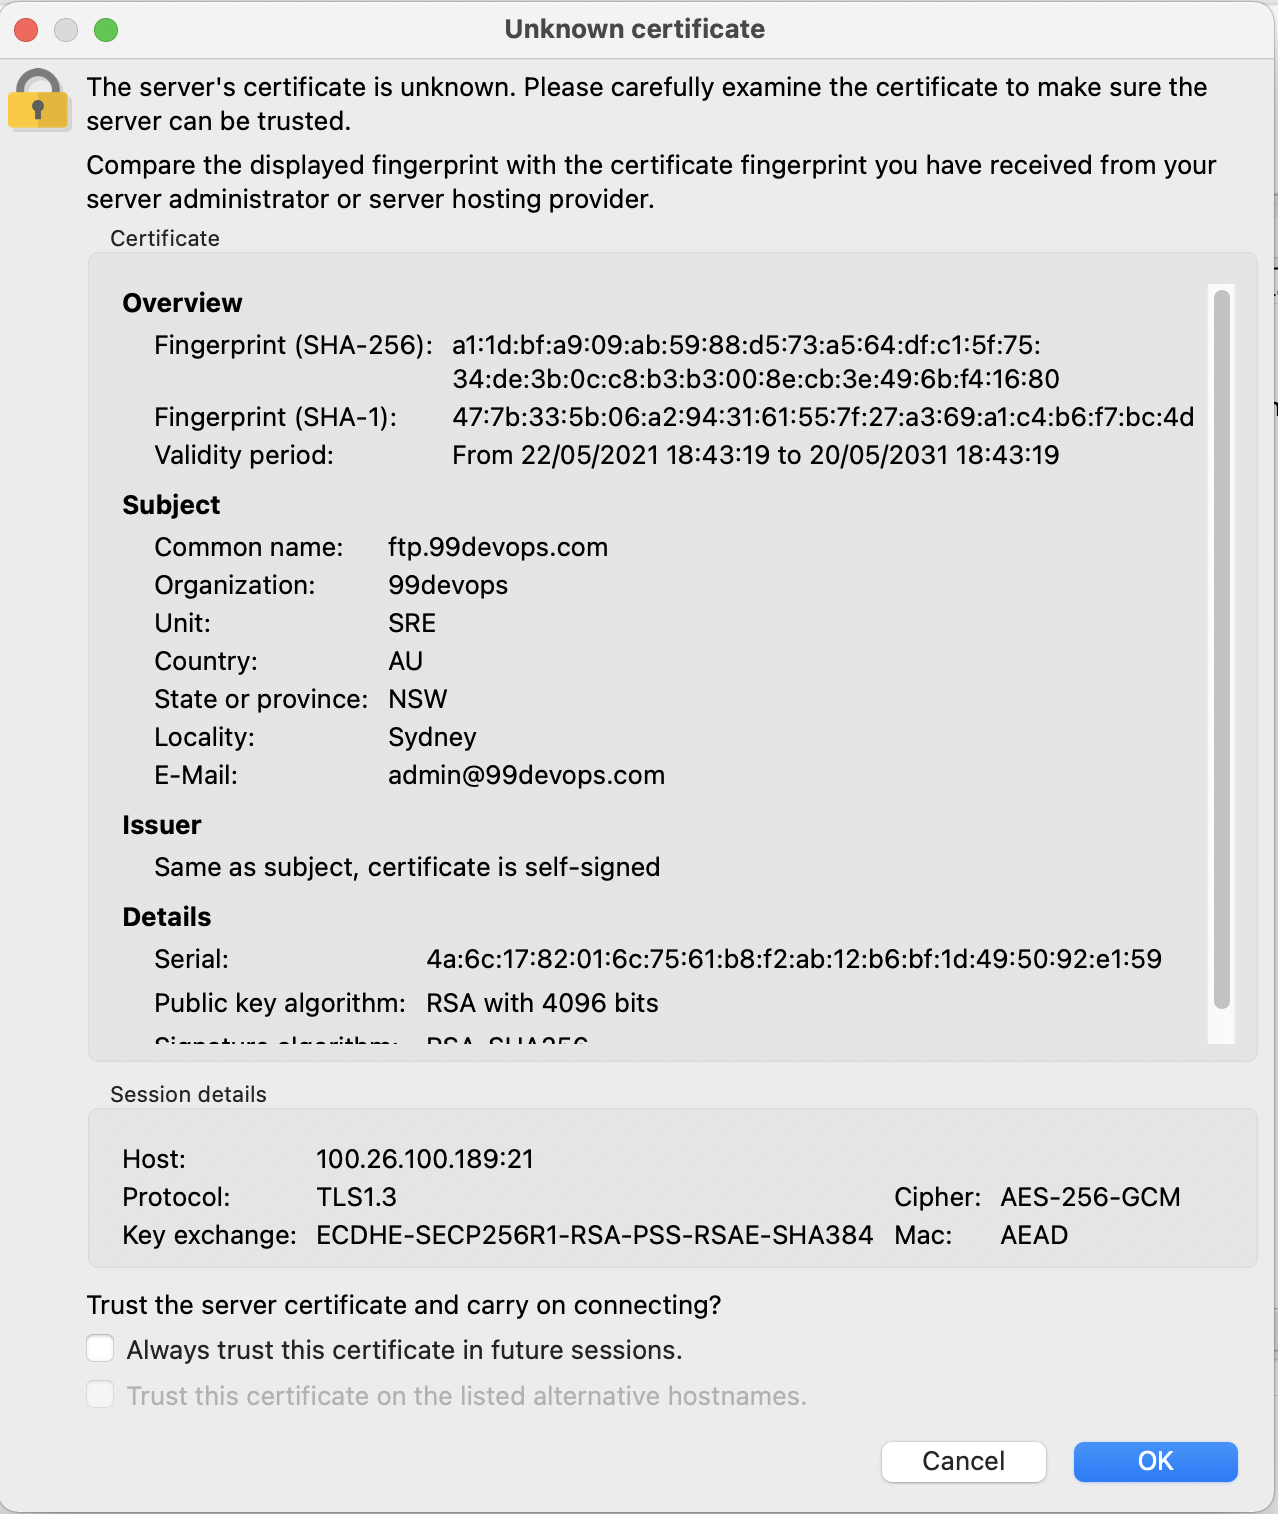
Enter password and you should be able to access server via FTP
On the logs you should see something like this
Status: Connecting to 100.[REDACTED_IP]:21...
Status: Connection established, waiting for welcome message...
Status: Initializing TLS...
Status: Verifying certificate...
Status: TLS connection established.
Status: Logged in
Status: Retrieving directory listing...
Status: Server sent passive reply with unroutable address. Using server address instead.
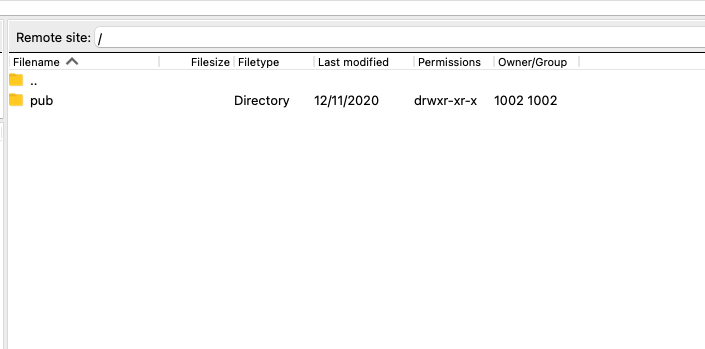
Status: Directory listing of "/" successful
And FTP directory should be shown
Recommendation:
It is not good practice to expose server public ip and access directly from the internet, if it requires accessing via the internet, please move the server behind a classic load balancer like ELB and make sure ports are mapped correctly on the LB. FTP requests should be coming into you LB and then forwarded to your server. Your server should only be receiving data originating from the LB not the internet.
Client -> LB -> Firewall(ACL) -> Server
Also, if ELB is used, a change is required on the vsftpd.conf file which is “ pasv_address” should include the ELB ip address not the server.