11 minutes
Building a simple crypto trading bot using Python, Docker and Github Actions.
CI / CD has been a major part of current IT operations. In this series of articles, we will learn how to create a simple crypto trading bot and implement it through complete CI / CD operation. As there is a saying “best way to learn, is by doing.”
How this article is organised ?
For each challenge there will be are tasks and solutions provided. You can do the task by yourself in your own way or you can follow the solution to see how i have done it. As long as you are understanding the things done and why it’s done, we should be all good.
What we are doing to do in this article
Before we begin
Let’s refresh the some knowledge before we start with the workshop.
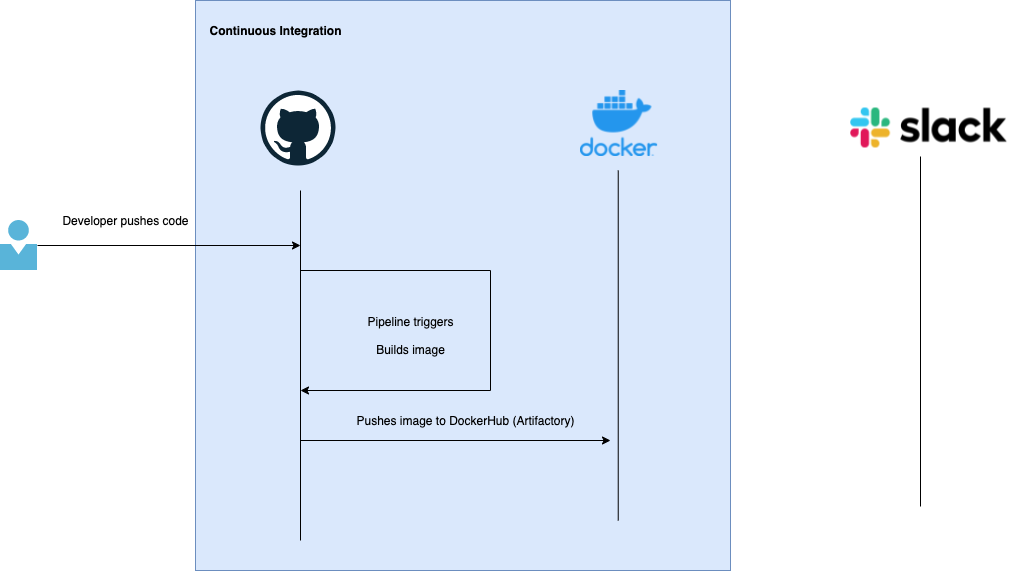
What is CI (Continuous Integration) ?
CI (Continuous Integration) is a process of automating code integration from multiple contributers into a single artifact or binary or package. CI is a philosophy where code from multiple developers are merged to form a single package which is later promoted to different stages in release cycle.
In this article we are doing to see an implemet of CI.
What is ChatOps ?
ChatOps is the streamlined use of chat applications and communication services to run development and operations functions and commands in CI / CD life cycle.
What is Github ?
Version control system which helps you to manage different versions of your code.
What is Docker hub ?
Dockerhub is a online docker image hosting registry where you can push your docker image and share it with comminuty.
Learn by doing
In this first part, we will create an application and dockerise it. This would invole creating an application from scratch and containerise it using docker.
For this task, we will be working on creating a crypto pricing bot and which will check the price of crypto coins every hour and inform you. Later, we will work on running the application in kubernetes using CI / CD.
Learning outcomes
After completing the series of articles, you will be able to do following things.
- Creating application to do a simple crypto trade and notify about the trade to the user via chat.
- Send message from code to slack channel. This is integral part of ChatOps.
- Containerise application using docker.
- Write kubernetes manifests for application to be hosted on kubernetes.
- Automate all these operations using Github Actions.
Pre
Before you start working on it, make sure you are inside your application directory.
cd ~
mkdir -p crypto-bot
cd crypto-bot
Task 1
Get yourself slack workspace, slack channel, slack bot and slack token. Before we create our application, we need to do extra things some things ready i.e.
-
Slack workspace
-
Slack channel
-
Slack bot
-
Add OAuth permission to that bot
-
Get oauth API Token.
-
Add slack bot to the particular channel.
-
Github repository
-
Dockerhub account
Solution 1
You can follow this video until 5 min to get your slack workspace, channel, bot setup and get the API token.
https://www.youtube.com/watch?v=KJ5bFv-IRFM
Once you are done, you should have a slack token which looks like this
xoxb-2387234-XXXXXX.....
For this demo i have created a slack workspace, and a slack bot named “Lekhpal” (This means accountant in Nepali ;) )
Please note down following things:
-
The channel name
-
Slack bot username
-
Slack token somespace
For github repo and docker hub account, you should be able to create them by yourself. :)
Creating a crypto bot application
Now, since we have setup out notification section, let’s create a trading bot. Our crypto bot is simple. It will run API request to a provider to fetch crypto latest pricing information. I will be using python for this but you can use any language of your choice.
Task 2
Write a program which would give the latest crypto information and push that information to slack channel.
Solution 2
let’s first create a folder where we will put all our source code and name it “src” and create a file named “crypto-app.py” inside it.
mkdir -p src
touch crypto-app.py
What this application does is:
-
It uses COINSPOT public API to get latest price of defined cryptos and creates a JSON data.
-
JSON data is then sent to a function which pushes message to slack channel which we configured in Task 1.
You can copy paste following code into the file. Please do not mind the poor programming paradigms, this was just a PoC. Later we will refactor the app to be more better, faster and optimised.
Now, run you application to see if your application send the messages to slack. In console you should see something like this.
In slack, you should now see your bot sending message

Wooo..hooo…. :)
Congratulations. You have created a bot which checks BTC price and does fake buys of BTC and notifies in slack about your transaction.
Containerise your application
Now, since we have our application ready, we are ready to containerise it. I will be using docker for it, but you can use any container runtime to create a container.
Task 3
Write a Dockerfile for your application
Solution 3
Create a dockerfile into the main working directory i.e crypto-bot directory.
touch Dockerfile
Copy and paste the following contents of into that Dockerfile.
What happens here is:
-
It pulls the base python:3.9 image from dockerhub
-
Adds label to the docker image when we create it.
-
Installs required packages
-
Copies the src folder into /app directory inside container
-
Installs all the extra packages required to run the applications from requirements.txt file
-
Starts the application
Let’s try to build the image and run the container.
Build docker image
run docker container to see if it works.
You should see the same message notification in slack.
Pushing image to registry
Kubernetes pull image from container registry. We will be using DockerHub as our container registry. You can use any other container registry like Jfrog etc.
Before this, you would need docker hub username and password. You can sign up for docker hub if you do not already have an account.
Task 4
Create docker hub account and save username and access token somewhere.
Solution
Sign up for docker hub from here https://hub.docker.com/signup
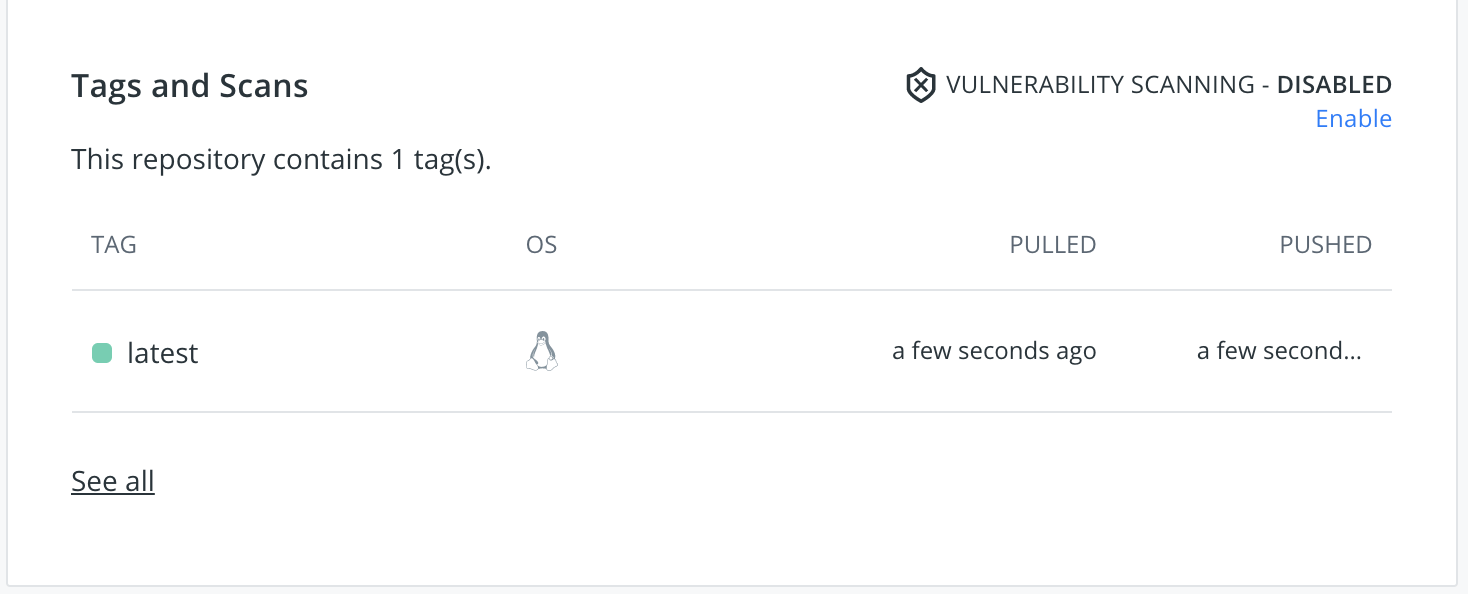
Once you have the docker hub account, you need to create a repository for your docker image that we are going to push. I have named the repo name “crypto-app” as that is the image name that we are going to use.
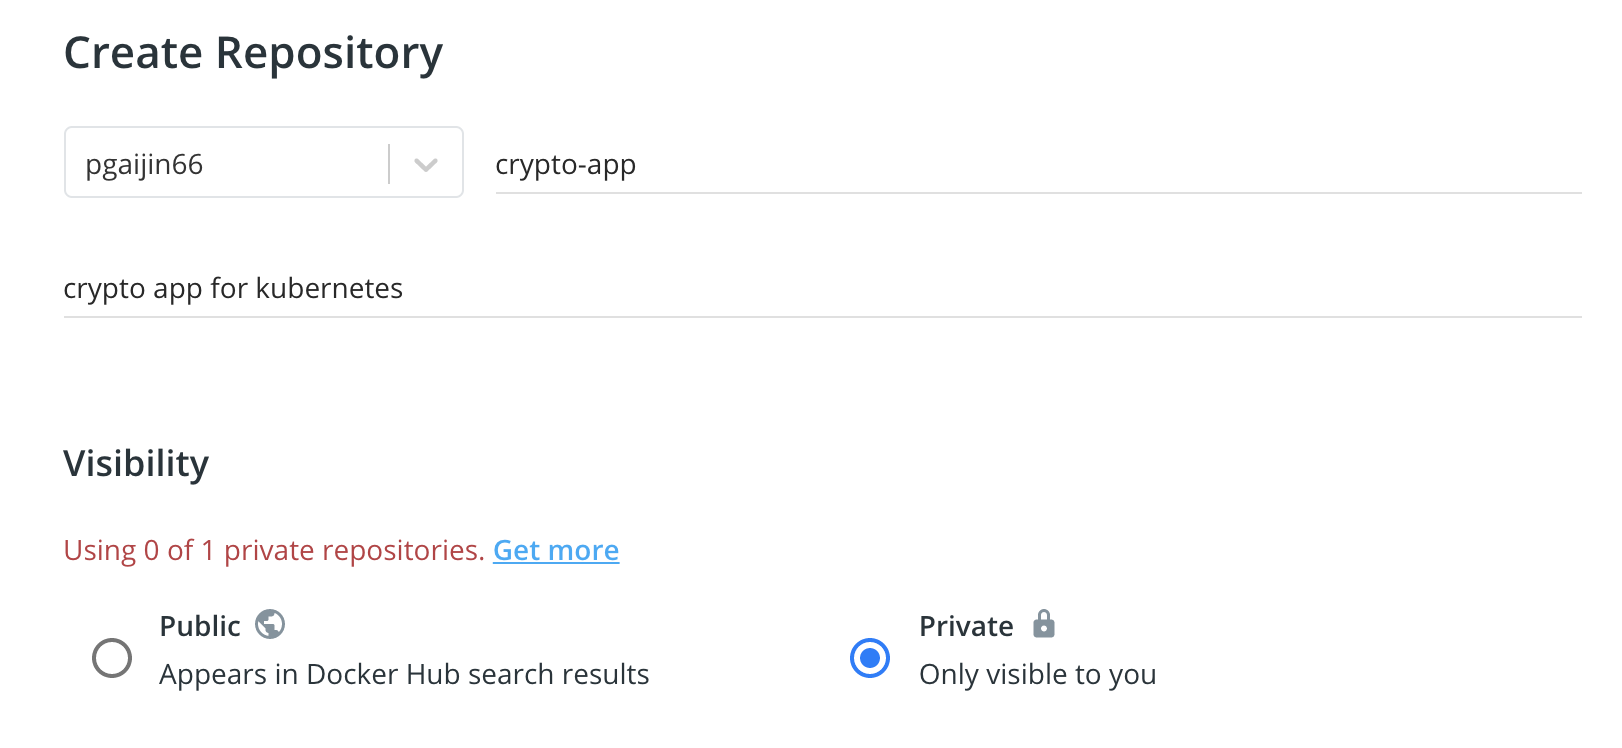
Once you have the repository created it will look like this

Task 5 (Add dockerhub creds to Github secrets)
Add docker hub username and access token to github secrets.
Solution 5
Now, since we are able to push image, we will try to do automatically using Github Actions. This will push build our container and push our image to dockerhub automatically. First of all, you need access token from docker hub to push image. To get access token https://hub.docker.com/settings/security go here and create a token named GITHUB_ACTIONS, save that token somewhere. we will need it later.
It will look like this once you created the access token

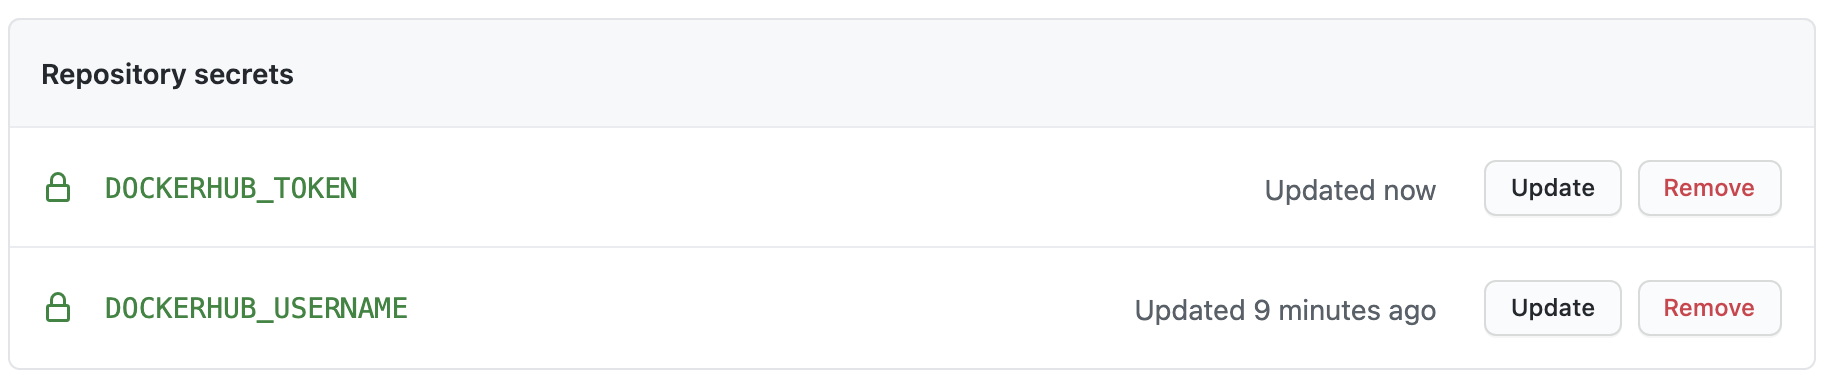
Now, Create github secret for your dockerhub username and access token which github will use to build and push image to dockerhub.
In order to create secret, go to repo Settings > Secrets.
Create two secrets named DOCKERHUB_USERNAME and DOCKERHUB_TOKEN once you add it, it will look like this
Task 6
Setup CI workflows in github actions to push image to your dockerhub repository.
Solution 6
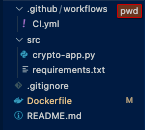
Create .github folder and create another folder inside .github called workflows and again create a file named ‘CI.yml’ inside workflows folder.
mkdir -p .github/workflows
touch .github/workflows/CI.yml
Inside that CI.yml file add following code which will automatically build and push your image to dockerhub.
NOTE: I have have used the tag name as ${{ secrets.DOCKERHUB_USERNAME }}/crypto-app:latest where crypto-app is the name of our dockerhub repository.
Once you add these, you are ready to commit to github. Your main directory folder structure should look like this
Now commit your change
git add .
git commit -m "Adding Continuous integration"
git push origin master
When you commit the change into github, you can go to actions in tabs in your repository, you should see the CI build running and hopefully passing ;). This builds docker image from the Dockerfile that we created and tags the image appropriately so that it is pushed in the docker hub repo that we created.

and pushing image to dockerhub which you can verify by going to dockerhub.
So, what just happenned ??
When we committed the code, it automatically detected change in repository, and ran our build operation and for now our build operation was creating docker image as artifact and pushing it to docker hub automatically.
Congratulations, you just continuous integration of your application.
What did we learned ?
- Use cURL to send post requests
- Parse Json response using python
- Send message from application to slack channel
- Containerise python application into a docker image
- Run docker image
- Push image to docker hub using github action
- Hands-on continuous integration
Conclusion
This concludes the first part of our workshop. We did a lot of things here and learned a lot of stuffs. We have succesfully completed continuous integration part of our CI / CD workshop.
What’s next ?
In next article, I will be showing you how you can do the continuous delivery and deployment (CD) on kubernetes.
Please share it with your friends if you liked what you learned today. We aim of this is to educate everyone on devops practices starting with CI / CD.
Congratulations on the hard work, here are some cookie for you…. :)