4 minutes
BYOK8S - Build Your Own Kubernetes Cluster
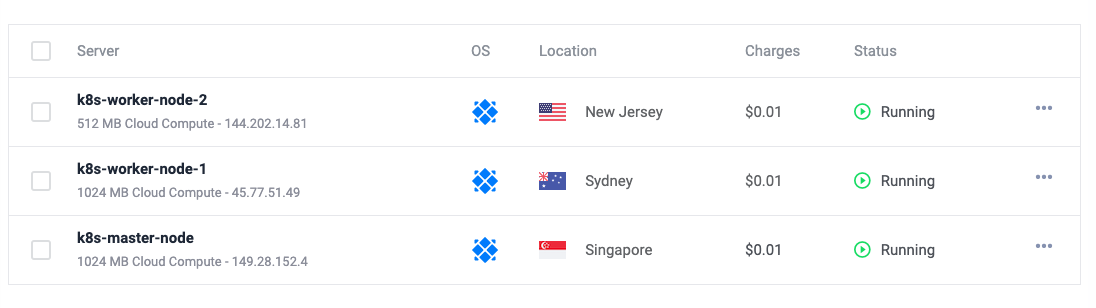
Today, i will show you how you can run your own multi-region k8s cluster. First of all,you need to have 3 working vm ready so that we can work on. For this demo, i have created 3 VMs on vultr cloud provider which can be seen in the following image.
Now, once you have vm working, there are couple of things that needs to be done.
System configuration and Installing kubelet, kubeadm and kubectl (On all nodes)
First, edit the host file of each vm public IPs and hostname in /etc/hosts file.
Master node
127.0.0.1 master-node
IP_OF_WORKER worker-node1
IP_OF_WORKER_2 worker-node2
Worker node 1
127.0.0.1 worker-node1
IP_OF_MASTER master-node
IP_OF_WORKER_2 worker-node2
Worker node 2
127.0.0.1 worker-node2
IP_OF_MASTER master-node
IP_OF_WORKER_2 worker-node1
Once you have done this, you can now try to ping all three using their hostnames.
Its working, now lets add yum repository for kubernetes and docker.
Run following command to add repository for kubernetes and docker in all three nodes.
Make sure you run all these commands on all nodes.
cat <<EOF > /etc/yum.repos.d/kubernetes.repo
[kubernetes]
name=Kubernetes
baseurl=https://packages.cloud.google.com/yum/repos/kubernetes-el7-x86_64
enabled=1
gpgcheck=1
repo_gpgcheck=1
gpgkey=https://packages.cloud.google.com/yum/doc/yum-key.gpg https://packages.cloud.google.com/yum/doc/rpm-package-key.gpg
EOF
and
sudo yum-config-manager --add-repo https://download.docker.com/linux/centos/docker-ce.repo
Once you have done this, there are couple of installation that needs to be done. I will copy paste the whole command, please make sure you know what you are doing.
Install kubelet, kubeadm and kubectl
sudo yum install -y kubelet kubeadm kubectl
Start and enabled kubelet process
systemctl enable kubelet
systemctl start kubelet
Now, lets set the hostname based on the /etc/hosts file
On Master
sudo hostnamectl set-hostname master-node
On worker node 1
sudo hostnamectl set-hostname worker-node1
On worker node 2
sudo hostnamectl set-hostname worker-node2
Now, take time and make sure you can ping all of the server with one another using their hostnames.
Firewall configuration (On All Nodes)
Now, we need to do some firewall configuration. Allow following port to be enabled in the OS firewall on all the nodes.
sudo firewall-cmd --permanent --add-port=6443/tcp
sudo firewall-cmd --permanent --add-port=2379-2380/tcp
sudo firewall-cmd --permanent --add-port=10250/tcp
sudo firewall-cmd --permanent --add-port=10251/tcp
sudo firewall-cmd --permanent --add-port=10252/tcp
sudo firewall-cmd --permanent --add-port=10255/tcp
sudo firewall-cmd --reload
Now, we need to enable bridge networking so that packets coming in on bridge interface are processed by IPtables.
cat <<EOF > /etc/sysctl.d/k8s.conf
net.bridge.bridge-nf-call-ip6tables = 1
net.bridge.bridge-nf-call-iptables = 1
EOF
reload system
sysctl --system
Now, disable SELINUX and swap as it causes problem to kubelet process.
sudo setenforce 0
sudo sed -i ‘s/^SELINUX=enforcing$/SELINUX=permissive/’ /etc/selinux/config
sudo sed -i '/swap/d' /etc/fstab
sudo swapoff -a
Install docker (On All Nodes)
We will be using dokcer as CNI for kubernetes.
sudo yum install -y yum-utils device-mapper-persistent-data lvm2
sudo yum-config-manager --add-repo   https://download.docker.com/linux/centos/docker-ce.repo
sudo yum update -y && sudo yum install -y   containerd.io-1.2.13   docker-ce-19.03.11   docker-ce-cli-19.03.11
Create a docker directory for docker configuration to be stored.
mkdir -p /etc/docker
Adding following configuration in daemon.json file.
cat <<EOF | sudo tee /etc/docker/daemon.json
{
  "exec-opts": ["native.cgroupdriver=systemd"],
  "log-driver": "json-file",
  "log-opts": {
    "max-size": "100m"
  },
  "storage-driver": "overlay2",
  "storage-opts": [
    "overlay2.override_kernel_check=true"
  ]
}
EOF
Create systemd directory for docker service
sudo mkdir -p /etc/systemd/system/docker.service.d
reload daemon and restart docker
sudo systemctl daemon-reload
sudo systemctl restart docker
sudo systemctl enable docker
Initializing kubernetes cluster (On Master Node)
Now run following command to initialize kubernetes master node
sudo kubeadm init --pod-network-cidr=10.244.0.0/16 --ignore-preflight-errors=NumCPU,Mem
Pre-flight checks for CPU and Memory requierments and fails the setup. For learning purpose we do not need this.
Now create .kube where your config will reside
mkdir -p $HOME/.kube
Copy the kubeconfig file to .kube directory.
sudo cp -i /etc/kubernetes/admin.conf $HOME/.kube/config
sudo chown $(id -u):$(id -g) $HOME/.kube/config
Kubernetes needs CNI (Container Network Interface) to communicate between pods. We are going to use flannel as CNI for our cluster.
sudo kubectl apply -f https://raw.githubusercontent.com/coreos/flannel/master/Documentation/kube-flannel.yml
Now we are done on master. Wait for some time and run.
kubectl get nodes

NAME           STATUS   ROLES                  AGE   VERSION
master-node    Ready    control-plane,master   18m   v1.20.2
Adding worker nodes to the cluster (On worker nodes)
Paster the kubeadm join which was provided when you ran kubeadm init command.
NOTE: If you are using cloud VM, make sure the port 6443 is enabled on your VM so that the master and worker nodes can communicate with each other.
kubeadm join 149.28.152.4:6443 --token 6phmnm.xu4ot5287s5zsa5t     --discovery-token-ca-cert-hash sha256:1d01487792f54ec95d56d3a5cf9525858411da6b4b9c5d8db80f3275b182a693

[preflight] Running pre-flight checks
[preflight] Reading configuration from the cluster...
[preflight] FYI: You can look at this config file with 'kubectl -n kube-system get cm kubeadm-config -o yaml'
[kubelet-start] Writing kubelet configuration to file "/var/lib/kubelet/config.yaml"
[kubelet-start] Writing kubelet environment file with flags to file "/var/lib/kubelet/kubeadm-flags.env"
[kubelet-start] Starting the kubelet
[kubelet-start] Waiting for the kubelet to perform the TLS Bootstrap...

This node has joined the cluster:
* Certificate signing request was sent to apiserver and a response was received.
* The Kubelet was informed of the new secure connection details.

Run 'kubectl get nodes' on the control-plane to see this node join the cluster.
Once you are done with this, wait for some time and run kubectl get nodes. You should see your cluster ready.
kubectl get nodes

NAME           STATUS   ROLES                  AGE   VERSION
master-node    Ready    control-plane,master   34m   v1.20.2
worker-node1   Ready    <none>                 30m   v1.20.2
worker-node2   Ready    <none>                 30m   v1.20.2
That’s it, you have your vanilla k8s cluster ready.